...

Preparing Garden Fence Panels
for Painting / Preserving

A Step-by-Step Guide to Enhance and Protect Your Wooden Fence

Painting and preserving your wooden garden fence panels can greatly enhance their appearance and extend their lifespan. Follow our detailed guide to ensure your fence is properly prepared and protected, ready to withstand the elements.

1

Gather Your Materials

Before you start, make sure you have all the necessary materials and tools:

  • Protective gloves and goggles.
  • Pressure washer or garden hose with a spray nozzle.
  • Scrubbing brush or wire brush.
  • Mild detergent or fence cleaner.
  • Sandpaper or electric sander (medium grit).
  • Decorator’s tape.
  • Dust sheets or tarps.
  • High-quality Garden fence panel paint / preservative.
  • Paintbrushes, paint sprayer (optional), rollers, and paint tray.
  • Fence Protector Kit, (optional).

2

It's important to Clean your Fence Panels and Concrete Posts before painting / preserving.

  1. Remove Debris: Clear any debris, leaves, or cobwebs from the fence panels and concrete posts.
  2. Washing: Use a pressure washer or garden hose with a spray nozzle to thoroughly clean the fence panels & concrete posts. Remove dirt, Mold, and algae. For stubborn stains use a scrubbing brush and mild detergent.
  3. Rinse and Dry: Rinse the fence panels and concrete posts with clean water and allow them to dry completely. This may take 24-48 hours depending on the weather.

3

Sand the Wooden Fence Panels

  1. Inspect for Rough Spots: Once the fence panels are dry, inspect them for any rough spots or splinters.
  2. Sand the Surface: Use medium-grit sandpaper or an electric sander to smooth the surface of the wooden panels. Focus on removing any peeling paint or rough areas to ensure an even finish.
  3. Clean Off Dust: Wipe down the panels with a damp cloth to remove dust and sanding residue.
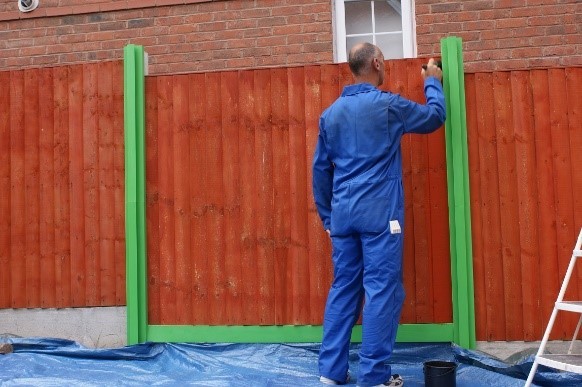
  4. Mask all areas not being painted: using Fence Protector Kit (Optional ) or decorator’s masking tape

4

Apply Paint / Preservative

  1. Choose the Right Preservative: Select a wood preservative suitable for exterior wooden fence panels.
  2. Apply the Preservative: Using a paintbrush or sprayer, apply the paint / preservative evenly to all wooden surfaces. Make sure to cover all areas, including edges and corners, to protect against rot and insect damage.
  3. Don’t rush: Allow the first coat to dry completely (following the paint manufacturer’s instructions). Apply a second coat for a more durable and vibrant finish.
fenceprotector

5

Final Touches and Clean-Up

  1. carefully remove Fence Protector Kit or painter’s tape from the concrete posts & gravel boards before the paint fully dries to avoid peeling.
  2. Inspect and Touch-Up: Inspect the fence for any missed spots or drips and touch up as necessary.
  3. Clean Tools: Clean your brushes, rollers, and other tools immediately after use.

Tips for Success

Weather Conditions: Choose a dry, mild day for painting to ensure the paint dries properly. Avoid painting in extreme temperatures or high humidity.

Regular Maintenance: To keep your fence looking fresh, perform regular maintenance such as cleaning and touch-up painting as needed.

In Our Opinion:

Regularly cleaning a timber fence ensures its longevity and maintains its appearance. Removing algae, mildew, and Mold not only enhances the fence’s aesthetic appeal but also prevents wood rot and decay. This maintenance routine protects the wood from moisture damage and extends the fence’s lifespan, saving you money on repairs and replacements in the long run. Additionally, a clean fence contributes to the overall curb appeal of your property, making it look well-maintained and attractive.

Seraphinite AcceleratorOptimized by Seraphinite Accelerator
Turns on site high speed to be attractive for people and search engines.